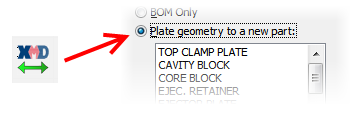
Starting the Plate Export procedure is the same as in prior versions of XMD. Run the Export command in XMD’s Main menu. Select the “Plate geometry to a new part” option. Pick one, or multiple plates to export (by clicking and dragging, or by holding the Control key), and hit OK.
 From here, you are presented with a newly designed dialog (pictured below) with a variety of options. It is important to note the default settings for these options can be configured in the XMD Config program.
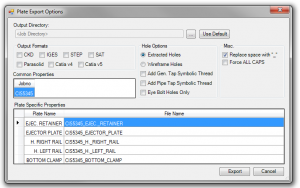
The following options are available to the user:
Output Directory
Instead of simply opening up the exported geometry in a new, unsaved part file, XMD will now automatically save your file to the directory of your choosing. The default location is in the job directory in a new folder called “Export”. You can override this by pressing the […] button and navigating to a different directory. No matter which directory is chosen, the export file is placed in a date/time-stamped sub-folder so there won’t be any naming conflicts.
Output Formats
You are now able to specify one or more file formats you would like to your geometry translated to. The formats we currently allow are CKD, IGES, STEP, SAT, Parasolid, and Catia v4 and v5 (assuming you have the proper KeyCreator license). If your format of choice is not listed here, but is supported by KeyCreator, let us know! We should be able to add it for you without much trouble.
Hole Options
Depending on the stage of design, and who you’re sending the plate(s) out to, you may want to change a few things about the way XMD outputs the holes.
Extracted/Wireframe Holes: XMD can represent the holes by extracting them directly from the plate solid, or by using wireframe geometry, leaving the solid untouched.
Add Generic/Pipe Tap Symbolic Threads: As you probably know, XMD is fully capable of rendering the threaded portions of holes. We know that some shops need this thread representation as a part of their process and so you may include them for either generic holes (including screws), or pipe taps, or both!
Eye Bolt Holes Only: Does just what it says! (Stay tuned, more flexibility in regard to specific holes and hole types are coming.)
Miscellaneous
Replace space with “_”: Many computer programs don’t like spaces in file names, so this option can be used to replace them with underscores.
Force ALL CAPS: Use this option if your shop prefers file names to be in CAPITAL LETTERS.
File Name Fields
Out of the box, XMD’s file name convention is pretty basic. It starts with the job number (which can be set with the Modify Title Block command), adds an underscore, and finishes with the plate name.
Using the Plate Export Configuration Utility, shops can configure XMD to follow their own file naming convention, which is basically just a series of fields in a particular order. For example, the image below shows a template that was defined as 1) job number, 2) plate code, 3) plate number, 4) detail number, 5) revision number, 6) designer, 7) date.
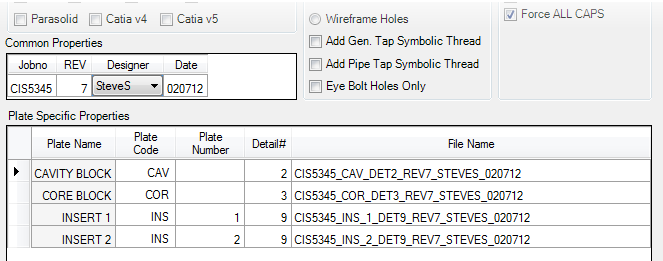
You can see that the file name has been assembled by placing the values in the tables in the predefined order. Once a value in the table has been modified, the file name field is updated automatically.
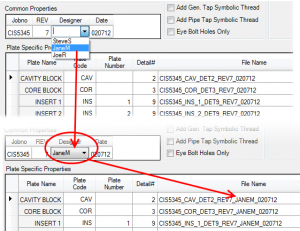
Fields can be either Plate Specific (such as detail #, plate code), or Common (date, revision, etc.). Common fields are located in the upper table whereas plate specific fields are in the table below.
There are a number of fields that XMD is capable of filling in automatically such as the job number, or a plate’s detail number. However, custom fields (such as “revision” and “designer” in our example) must be set by the user.
Export
Once satisfied with the options, click the Export button. Some basic validation will be performed to verify that the file names are valid, unique, and that all the required fields have been set. Once validated, XMD will proceed to export the plates one by one.
 Once completed, a report is given of the export process. If there were any errors detected during the process, they would be reported, otherwise the designer would be prompted that the plates were exported successfully.
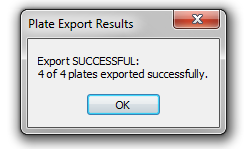
Lastly, a Windows Explorer window is opened containing the exported files.
